Spring session實(shí)現(xiàn)共享單點(diǎn)登錄案例過程解析
一、項(xiàng)目構(gòu)建
1、案例說明
本文主要演示單點(diǎn)登錄功能,會(huì)貼出主要配置和代碼以及必要解釋,全部代碼請(qǐng)參考git地址。session共享一個(gè)基本原則是將session存儲(chǔ)在某個(gè)地方,所有的應(yīng)用都可以訪問,這里使用redis存儲(chǔ)session。當(dāng)應(yīng)用需要認(rèn)證時(shí),先從redis讀取用戶信息。
2、基本配置
1)pom.xml
<dependency> <groupId>org.springframework.session</groupId> <artifactId>spring-session-data-redis</artifactId></dependency><dependency> <groupId>redis.clients</groupId> <artifactId>jedis</artifactId></dependency><dependency> <groupId>org.springframework.session</groupId> <artifactId>spring-session</artifactId> <version>1.3.1.RELEASE</version></dependency>
2)application.properties
server.port=8080spring.session.store-type = redisspring.redis.host=192.168.7.151spring.redis.port=6379
本案例的兩個(gè)應(yīng)用完全一樣,一個(gè)端口是8080,一個(gè)端口是80
3、代碼變動(dòng)
1)新增SimpleImageCode.java
public class SimpleImageCode implements Serializable{ private static final long serialVersionUID = 1L; private String code; private LocalDateTime expireTime; public SimpleImageCode(String code,LocalDateTime expireTime) { this.code = code; this.expireTime = expireTime; } public String getCode() { return code; } public void setCode(String code) { this.code = code; } public LocalDateTime getExpireTime() { return expireTime; } public void setExpireTime(LocalDateTime expireTime) { this.expireTime = expireTime; } public boolean isExpried() { return LocalDateTime.now().isAfter(expireTime); }}
該類與ImageCode.java基本一樣,區(qū)別1:實(shí)現(xiàn)了Serializable接口;區(qū)別2:沒有BufferedImage屬性。原因是圖形驗(yàn)證碼要放入session中,而session需要存放到redis中,所以必須實(shí)現(xiàn)序列化接口。一個(gè)類實(shí)現(xiàn)序列化接口,它里面的類屬性也要實(shí)現(xiàn)序列化接口,但是BufferedImage是jdk的類,無法實(shí)現(xiàn)序列化接口,這樣就不把它放入到redis中,在校驗(yàn)時(shí),我么只會(huì)校驗(yàn)驗(yàn)證碼和過期時(shí)間,所以不會(huì)影響。
2)修改ValidateCodeController.java
@GetMapping('/code/image')public void createCode(HttpServletRequest request,HttpServletResponse response) throws Exception { ImageCode imageCode = createImageCode(request); SimpleImageCode simpleImageCode = new SimpleImageCode(imageCode.getCode(),imageCode.getExpireTime()); //request.getSession().setAttribute('imageCodeSession', imageCode); request.getSession().setAttribute('imageCodeSession', simpleImageCode);//序列化到redis中 ImageIO.write(imageCode.getImage(), 'JPEG', response.getOutputStream()); }
將SimpleImageCode放入到session中
3)修改ValidateCodeFilter.java
private void validate(HttpServletRequest request){//ImageCode codeInSession = (ImageCode)request.getSession().getAttribute('imageCodeSession'); SimpleImageCode codeInSession = (SimpleImageCode)request.getSession().getAttribute('imageCodeSession'); String codeInRequest = request.getParameter('imageCode'); ... ...//校驗(yàn)邏輯 request.getSession().removeAttribute('imageCodeSession'); }
校驗(yàn)驗(yàn)證碼前從session中取出SimpleImageCode
二、測試驗(yàn)證
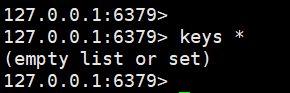
1)啟動(dòng)redis、80端口應(yīng)用、8080端口應(yīng)用,查看redis信息為空,如下:
2)瀏覽器輸入:localhost:8080/index.html,跳轉(zhuǎn)登錄頁面,查看redis,如下:

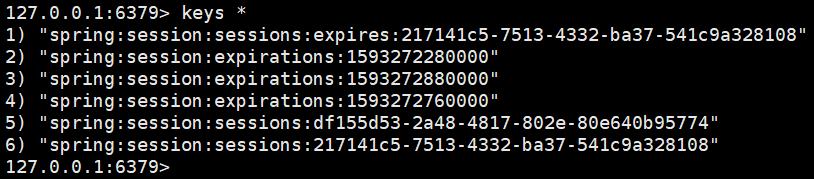
3)登錄后,查看redis,如下:

4)同一個(gè)瀏覽器輸入:localhost/index.html,直接跳到index頁面,查看redis,如下:

5)點(diǎn)擊index.html中的退出連接,查看redis,如下:

6)再次訪問localhost:8080/index.html,跳轉(zhuǎn)登錄頁面,查看redis,如下:
7)再次登錄8080的應(yīng)用,查看redis,如下:

通過測試發(fā)現(xiàn)實(shí)現(xiàn)了單點(diǎn)登錄。貼出截圖只是說明session存在了redis中,并且會(huì)隨著操作變化。實(shí)際無需關(guān)心redis。
以上就是本文的全部內(nèi)容,希望對(duì)大家的學(xué)習(xí)有所幫助,也希望大家多多支持好吧啦網(wǎng)。
相關(guān)文章:
1. python裝飾器三種裝飾模式的簡單分析2. 詳解java中static關(guān)鍵詞的作用3. Python如何進(jìn)行時(shí)間處理4. 詳解Python模塊化編程與裝飾器5. Java14發(fā)布了,再也不怕NullPointerException了6. PHP擴(kuò)展之字符編碼相關(guān)函數(shù)1——iconv7. python使用ctypes庫調(diào)用DLL動(dòng)態(tài)鏈接庫8. 關(guān)于Java下奇怪的Base64詳解9. Python實(shí)現(xiàn)迪杰斯特拉算法過程解析10. PHP swoole的process模塊創(chuàng)建和使用子進(jìn)程操作示例

 網(wǎng)公網(wǎng)安備