android studio xml文件實現添加注釋
即只能在組件布局代碼后,或者在組件的前面添加注釋。
#注釋格式:Android的XML文件注釋一般采用 <!--注釋內容 -->的方式進行
在XML中,形如 <Button /> 的表示方式,其中“/>”的含義表示這個XML中沒有內文,他是一個最小組成單元,也就是說他的中間不能包含其他任何< >的代碼,所以在<Button />中間注釋會出現錯誤
例如:
<?xml version='1.0' encoding='utf-8'?><!-- 在這里注釋是沒有問題的 --> <TextView android: android:background='@drawable/yellow' android:layout_width='fill_parent' android:layout_height='wrap_content' android:text='第二組第一項' /> <!-- 在這里注釋也是沒有問題的 --> <TextView android: android:background='@drawable/blue' android:layout_width='fill_parent' android:layout_height='wrap_content' android:layout_below='@id/right_view1' android:text='第二組第二項' />
補充知識:AndroidStudio XML文件之shape標簽使用詳解
前言:
shape標簽可以很方便的得到一些矩形、圓、橢圓、圓環,可以實現圓角、漸變,shape編寫出來的資源,可以作為View的背景,減少View使用圖片作為背景圖的概率,從而減少apk體積,相對比圖片要更節省內存,shape標簽編寫出來的資源一般放到drawable文件目錄下。
shape標簽如何使用:
shpae標簽的載體是一個xml文件,一個xml里同時只能存在一個shape標簽,在shape標簽里聲明一些屬性和嵌套標簽組合起來,可以得到一個視圖資源,利用該資源可以填充View的屬性
示例:
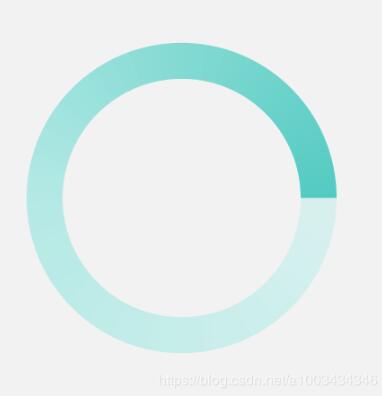
<!-- 圓環-流線型漸變 --><shape xmlns:android='http://schemas.android.com/apk/res/android' android:shape='ring' android:innerRadius='20dp' android:thickness='6dp' android:useLevel='false'> <size android: android: /> <!--掃描漸變shape不能設置角度 #00ff0000 #80ff0000 ffff0000 --> <gradient android:centerColor='@color/colorCyan' android:endColor='@color/colorGreen' android:startColor='@color/colorCyanine' android:type='sweep' /></shape>
shape標簽里面的屬性:
android:shape='XXX'
方型:rectangle,這也是默認的形狀圓型:oval線形:line環形:ring,上面示例就為環形如果android:shape='ring',以下屬性定義才會生效:
android:innerRadius : 環內部(中間的孔)的半徑,以dp表示android:innerRadiusRatio : 環內部的半徑,浮點型。以環寬度的比率表示。此值被 android:innerRadius覆蓋。默認值為 9。android:thickness : 環的厚度,以dp表示。android:thicknessRatio : 環的厚度,浮點型。表示為環寬度的比率。此值被 android:innerRadius 覆蓋。默認值為 3。android:useLevel : 布爾值。如果這用作 LevelListDrawable,則此值為“true”。這通常應為“false”,否則形狀不會顯示。
shape標簽里可以嵌套的標簽:
solid標簽的屬性: 用于填充形狀的內部顏色
android:color'XX'
corners標簽的屬性:為形狀產生圓角。僅當形狀為矩形時適用
android:radius : 所有角都進行圓角處理半徑,如果有單獨設置某個角,單獨設置的優先級最高android:topLeftRadius : 左上圓角android:topRightRadius : 右上圓角android:bottomLeftRadius : 左下圓角android:bottomRightRadius : 右下圓角
padding標簽的屬性:內邊距
android:left : 左內邊距android:top : 上內邊距android:right :右內邊距android:bottom :下內邊距
size標簽的屬性:形狀的大小,可以通過這里來設置形狀大小
android:height='XX'android:width='XX'
stroke標簽的屬性: 描邊,可以是實線也可以是虛線
android:width :線寬android:color :顏色android:dashWidth :虛線的間距。僅在設置了 android:dashGap 時有效android:dashGap : 虛線的厚度大小。僅在設置了 android:dashWidth 時有效
gradient標簽的屬性:形狀漸變顏色
android:angle : 整型。漸變的角度(度)。0 為從左到右,90 為從上到上。必須是 45 的倍數。默認值為 0。android:centerX : 浮點型。漸變顏色的位置 (0 - 1.0)。android:centerY : 浮點型。漸變顏色的位置 (0 - 1.0)。android:centerColor :顏色。起始顏色與結束顏色之間的可選顏色android:endColor : 顏色。結束顏色android:gradientRadius : 浮點型。漸變的半徑。僅在 android:type='radial' 時適用。android:startColor : 顏色。起始顏色android:type :要應用的漸變圖案的類型linear :線性漸變。這是默認值radial : 徑向漸變。起始顏色為中心顏色。sweep : 流線型漸變
動態創建GradientDrawable并使用:
用shape標簽定義的xml,最終都會轉化為GradientDrawable對象,所以創建GradientDrawable對象和定義shape文件是一樣的
//創建GradientDrawableGradientDrawable gd = new GradientDrawable();//對應形狀gd.setShape(GradientDrawable.RING);//對應內部填充顏色gd.setColor(Color.parseColor('#FFFF0000'));//對應圓角gd.setCornerRadius(5);//對應xml的strokegd.setStroke(3, Color.parseColor('#FFFF0000'));//給某個view使用view.setBackgroundDrawable(gd);
//如果要設置漸變顏色,方法一int colors[] = { 0xff255779 , 0xff3e7492, 0xffa6c0cd };//分別為開始顏色,中間夜色,結束顏色GradientDrawable gradientDrawable = new GradientDrawable(GradientDrawable.Orientation.TOP_BOTTOM, colors);//設置中間漸變顏色的位置gradientDrawable.setGradientCenter(1,2);//漸變typegradientDrawable.setGradientType(GradientDrawable.SWEEP_GRADIENT);//動態改變GradientDrawable的屬性GradientDrawable drawable =(GradientDrawable)view.getBackground();drawable.setColor(fillColor); // 設置填充色drawable.setStroke(strokeWidth, strokeColor); // 設置邊框寬度和顏色drawable.setColors(colors); // 設置漸變顏色數組
把資源文件轉換成Java對象:
GradientDrawable d = (GradientDrawable) context.getResources().getDrawable(R.drawable.loading_shape); d.setColors(PublicLibraryStyle.colorThemes); bindId(R.id.iv_loading).setBackground(d);
以上這篇android studio xml文件實現添加注釋就是小編分享給大家的全部內容了,希望能給大家一個參考,也希望大家多多支持好吧啦網。
相關文章:

 網公網安備
網公網安備